We’ll now explain some of the relevant options and how to use them.
GENERAL SETTINGS
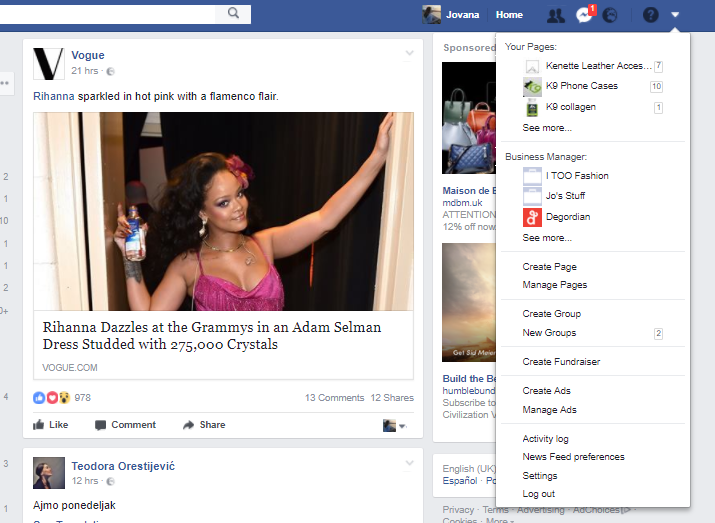
1. Page visibility – Once you open the page, you want to make sure that your page is unpublished until you start posting some content. Empty and unfinished pages seem unprofessional and that is not the impression you want to make.
2. Visitor posts – You can either allow people and other businesses to post on your page or disable that option. It’s highly recommended that this option stays allowed.
3. Tagging ability – This option should be enabled, because you’ll want to know what people are posting about your business on social media.
4. Country restrictions – You can prohibit some countries from visiting your page – for example, if you’re a retailer in France and you get lots of enquiries from California, but you cannot ship products overseas.
5. Age restrictions – Are you selling beer or wine? Make sure that underage audience cannot get to your page.
6. Page moderation – Block posts or comments containing certain words. This option can be very useful during political campaigns, for example.
7. Post in multiple languages – Enable people who manage your page to post in multiple languages. If you’re a company from the UK, but operate on French and German market as well, make sure that this option is enabled.
EDIT PAGE

In the Edit Page section, you can configure actions and tabs for your page. You can choose some of the following templates:
1. Shopping Template – designed to showcase products and make it easy for people to shop online;
2. Business Template – designed to help you manage your business, including ways to post jobs and special offers;
3. Venues Template – designed so you can highlight useful information such as your venue’s hours, location and upcoming events;
4. Charity Template – designed to highlight your cause and encourage people to fundraise and donate to your charity;
5. Politicians Template �– designed to help politicians reach their supporters and communicate their message;
6. Services Template – designed to help people find your services and get in touch;
7. Restaurants and Cafes Template – Designed to highlight photos and important information about your menu, hours and location;
8. Video Creator Template – Designed to showcase video creators whose focus is on building audience on Facebook;
9. Standard Template – Good for all page types, with buttons and tabs to help showcase what’s important to you.
Once you choose the right template for your business, just click Apply Template and your page will be set up. We recommend turning off Using Default Tabs, so that you can remove and add tabs within the template that fits your business’ needs.
PAGE ROLES
There are 6 different types of roles for people who manage Pages. When you create a Page, you become the Page’s Admin, which means that only you can change how the Page looks and publish as the Page. As an Admin, you can also assign roles and change others’ roles. Multiple people can have roles on a Page, but each person needs their own personal Facebook account. The roles are:
1. Admin – A person who can manage all the aspects of the Page.
2. Editor – A person who can create and delete posts on the Page, can go live as the Page, can send messages and reply to comments as the Page, create ads and promotions on the Page and see the Insights of the Page. This person cannot change your Page’s settings and assign or change roles on a profile. If you have a Social Media Manager for your business, this is the role that you want to assign to him/her.
3. Moderator – A person who can respond to comments and messages as the Page and create promotions and ads on the Page, but cannot create and publish posts. This role is suitable for people from your business’ customer service.
4. Advertiser – A person who can create promotions on the Page and track the Insights.
5. Analyst – A person who can only see Page Insights and create reports, but nothing other than that.
6. Live Contributor – A person who can do Live Posts as the Page. If you have any influencers for your business and you do takeovers, this is the role you should assign to them.
PARTNER APPS AND SERVICES
You can add some of the apps that Facebook has partnership with and make it easy for people do make appointment, order food, get quotes or more. Some of those apps are:
* Delivery.com – add an Order Now button to your restaurant Page and let customers order food directly via Facebook;
* Microsoft Bookings – lets your customers schedule appointments with your business directly with Facebook, even when you’re not around;
* MyTime – all-in-one online scheduling and marketing app for local businesses, and some of the features include: online booking, automated email and SMS marketing, online reputation management, reports and real-time messaging with clients;
* Zuppler – add online ordering and receive unlimited orders via your Facebook page.
If you have an Instagram account, you’ll want to connect it with Facebook to get these features:
* Managing your Instagram account information directly through Facebook;
* Managing Instagram comments from your Facebook page;
* Creating Instagram Ads via Facebook Ads Manager.
Switching to Instagram for Business on the Instagram app can have some additional benefits too, such as Insights for Instagram or Shoppable Instagram feeds.
Now that you’re finished with Page Settings, it’s time to fill in the About section of the Page.
Creating a Page Username can make it easier for your customers to find you in search, because pages with usernames can also create custom URLs that let people quickly visit and message them. Your username can be the name of your page or your brand. If you’re not using your brand’s name as a Page Name, it’s suggested that your username is the name of your brand.
Contact details are really important section of the about page. Make sure you enter the phone number and email address on which people can reach you at any time and add a website link. If you have a physical store, make sure you include the address and a map attached, so that people can easily find you.
More Info section is dedicated to presenting your business to customers who have not yet interacted in any way with your business, so you’d want to craft that one carefully. The Edit About is a short description of what your business does. You’d want to keep it short – one or two sentences – and you’d want to persuade the users to find out more about what you’re doing or selling. For example, if you’re a luxury fashion retailer, you can write:
“A selection of trendy luxury products from leading designer brands in the world.”
Or if you’re a digital agency, you can write:
“Digital Marketing Agency focused on making your business bloom online.”
Impressum is an optional field in many countries (exceptions are Germany, Austria and Switzerland, where this field is mandatory). Funding date is important for your company if you’re a heritage brand or if you have a long tradition of doing something, such as Making best ice-creams in New York since 1954. You’d definitely want to include that in your description, don’t you? Awards can also be really important, especially if you operate in B2B sector or if your business is an awarded restaurant or cafe. In Products section, you’d want to tell people more about your products or your brands – what are your products and why should they try them. If you’re a restaurant, you can Add Menu, too.
Once you got your potential customers’ attention, you’d want to engage with them and tell them even more about your business. This is why you should use the Story, where you can write the long description. Tell them more about why you exist, what is your motivation for being in business, what are your goals, mission and vision. You can also tell them more about your products or about your projects – don’t be afraid to get creative with storytelling!
And a final touch before you finish creating your page: A button, that is right below your cover photo and you can use it to tell people more about your business or to make it easy for them to contact you.

It’s automatically set to Send Message, but if you click on it, you will get more options:
1. Make a Booking with a button Book Now;
2. Contact Now with buttons Call Now, Send Message, Get Quote, Contact Us, Sign Up and Send Email;
3. Learn More About Your Business with buttons Learn More and Watch Video;
4. Shop With You or Make a Donation with buttons Show now and See Offers;
5. Download your app or Play Your Game with buttons Play Game and Use App;
6. Join Your Community with a button Visit Your Group.
Select the button you think it’s best for your business and click Next, where you’ll be asked to add some additional information (such as website link or phone number), depending on what button you previously chose.
Your Page is ready now and you can now start creating content for your page. Once you start posting content, make sure to publish your page in General Settings!


